Completed Rooms
- Entrance Stairs
- Sanctuary
- Corridors (x3)
- Chambers
- Guard Room
- Goblin and Orc Lairs
- Jail Cells
- Ogre Boss Lair
- Canal with Bridge
- Well
- Bridge over Lava
- More Lava...
- Caverns
Planned Rooms
- Throne Room
- Lava Lair
- Cross Corridor
- T-Corridor
- Other plans...
See Also
After reading the rules for Dungeonation I decided it would be a great quick game to play with family. The rules use 6×6 inch tiles for the rooms and corridors and I was inspired to build a 4×4 grid out of wood to hold these tiles that I would reproduce in a more 3D manner with cardboard and wood. I eventually decided use the grid as the room walls making them ¼ inch thick and approximately 2 inches tall. The result is to be a play area with elements of a game board and tabletop miniatures. Ideally it will be pretty solid and resistant to being knocked around by younger players.
I've made a good start on the tiles. The author suggests starting out with 1 entry, 2 corridors, a sanctuary, and a boss lair. The author also recommends the orc and goblin lairs, the guard room, and the jail to make the 9 starting tiles. Eventually each level could grow to 16 tiles, so I am making my game board big enough to hold that.
Since the walls of each tile (or room) will be part of the game board, I'll have the full 6 inch square for the room. But that also means I'll need to get creative when making things that normally attach to walls (tapestries, torches, etc.), though I will have each door space that is not used for custom wall decoration.
Plans
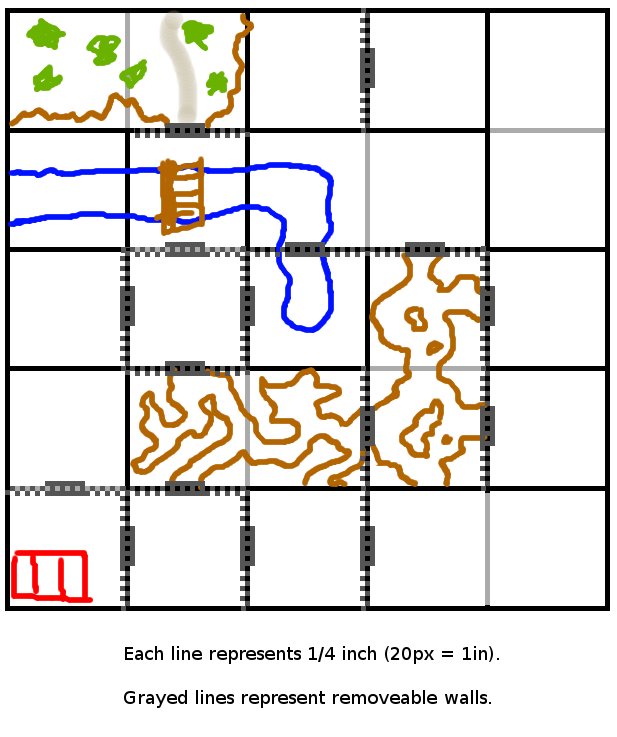
This is a sketch I've done to give me an idea of how I want to lay out the board. The rules limit the layout to a 4×4 square, but the plywood I've seen is about 3 feet square, so I've decided to go with 5×5 grid and make some of the squares with removable walls to make them 6×12 inches to accommodate large rooms.
In the picture below I've laid out some possible rooms, especially to see how I could take advantage of the double-wide rooms. On the edges I'd eventually like to have an entrance area that looks like outside — in addition to the normal stairway entrance.
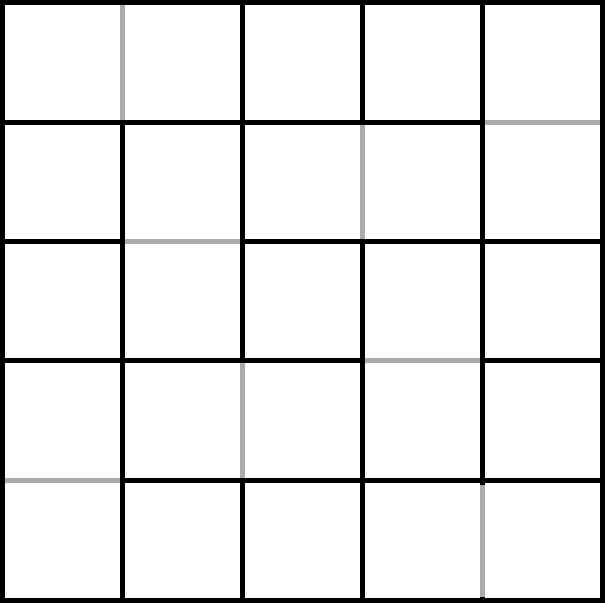
I also saved a template image with all the planning layers removed so I could see exactly where the removable walls should go.
Tiles
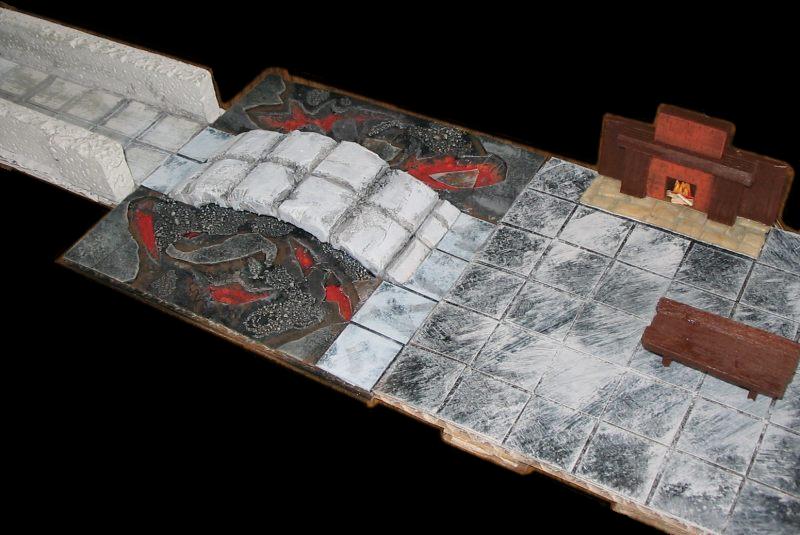
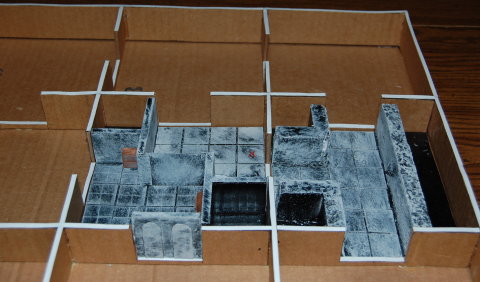
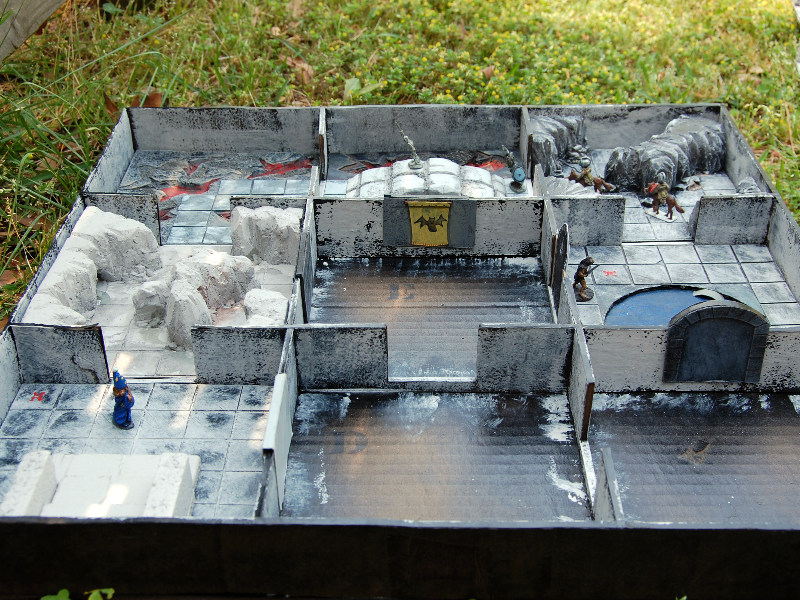
The tiles (i.e. rooms) are based on a double layer of corrugated cardboard. I am trying to get them to be about ¼ inch thick, to match up with the doors I'll be cutting in the walls. Most of the tiles I've made so far are based on the paper tiles created by the author, but the Canals and Well are my own creations.
Prototype Board
As of August 2007, I have made a prototype board with cardboard. It's a 3×3 grid and comes to about 19 inches square. It turned out better than I expected. The tiles fit perfectly (except where I didn't get a corner square), and the walls are working just like I had hoped. I saved the cut-outs from the doorways to replace as walls, and then I took some thick cardboard and cut it to rectangles of the same size (actually slightly wider) and glued the doors from the Dungeonation pdf on either side. Now I can slide either the doors or walls in place to complete the room. For open doors I've just been leaving the space open. I'm still thinking about what to do for "bashed-in" doors.
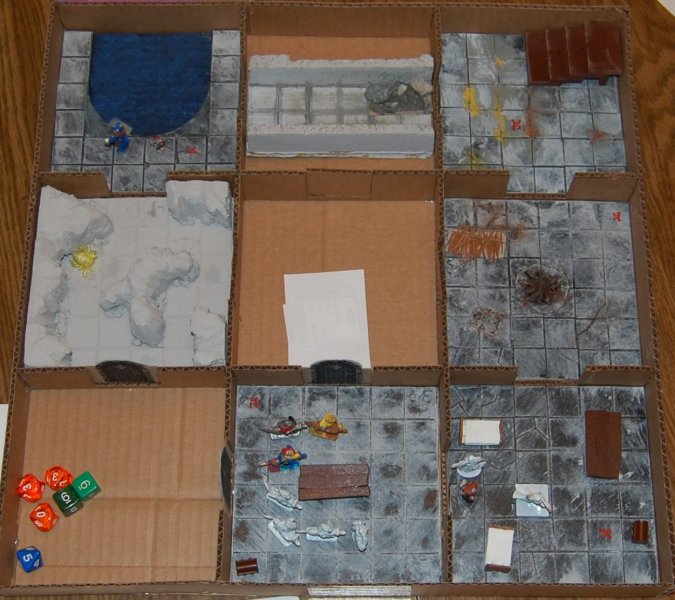
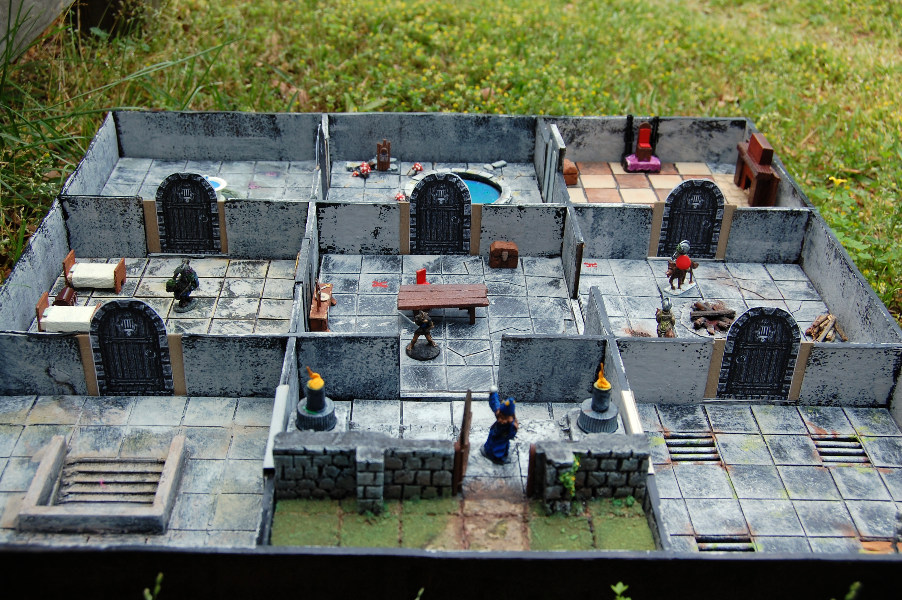
In the picture above you can see the layout after the game had been going on for about an hour and a half. The design worked really well. The rooms stay in place, and the walls are low enough for the players to reach in and move the figures around.
Although I had originally planned on remaking the game board using wood, the cardboard one has served well enough as it is, and even more importantly doesn't weigh much, that I decided to finish it. The first step was to cover the open ends of the cardboard walls with heavy paper (cardstock actually) to hide the ugly corrugations.
Painting was done like the rest of the rooms, starting with a base of black spray paint, and then dry-brushing with Cape Cod Gray. But the walls were too smooth to dry-brush, so instead I cut off a square of sponge (a yellow synthetic one used for housecleaning) and used it to paint the walls with a stippled pattern.
Completed Board
See more pictures at the Flickr gallery.