Materials Used:
Thin cardboard/heavy card
Styrofoam egg-carton
2 Small diameter square or round dowels (1/4 in. or 5mm)
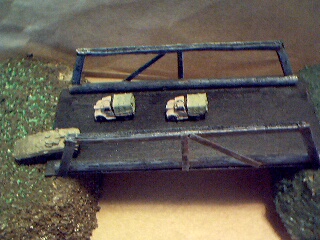
This was the first bridge I made. It is designed to span the space between two hills that would be placed near each other. I didn't have a definite length for the bridge in mind, but I did know how I wanted it to look.
I used a couple of small dowels (actually sticks used to eat corn that had one end sharpened into a point) for the sides of the bridge, I would have used square ones, but I didn't have any available. After cutting the pointed ends off, I used the length of one to determine the length of the bridge (about 5 in. or 12 cm) - the end of the bridge at each end was a little longer than the dowel.
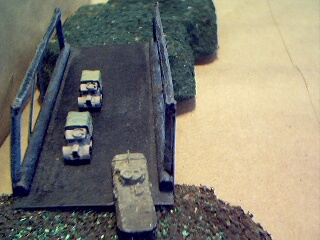
The width was roughly determined by placing two of my tanks side by side (it's a two-lane bridge!) on the cardboard and then rounding this width to the nearest measurement that struck my fancy.
After I cut out the bridge bottom from the card I glued the dowels along the edges of the long side.
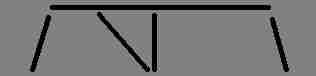
To make the suspension part, I started out with scraps of card and cut out narrow, rectangular strips and arranged them like the figure below shows:
I glued the two ends to the top first, then, when it was dry, glued it to the bridge. After both sides were attached to the bridge, I glued on the middle supports for each side.
Finding the card to be a little thin looking I grabbed an empty egg carton and cut out strips to match the ones made out of card and glued them on the inside of the suspension structure - it gave a much sturdier look to the bridge.
When the glue had dried, I covered it with a coat of black enamel paint, then dry-brushed it gray and finished up with rust washes in strategic places. I had planned on using crossbars between the sides to give it added support, but since I wanted to use it with Battletech® I had to get rid of that idea.