
Materials Used
- Pringle's Can
- Corrugated Cardboard
- Cardboard (from cereal boxes, etc)
- Wood
- Plaster Patch
- Latex Paint
Every time I schedule a game, I get a crazy idea for a new piece of terrain the week before and then stress about the deadline as I try to figure out how I can get it done in such short time. This time was no different.
The rules in the game, Crossfire, have the concept of a "Moving Clock" to keep track of game time. At first I was just going to borrow a toy clock from my kids. But then I had the great idea to build a clock tower. That way the clock would be integrated into the terrain on the game table. And so the project was born.
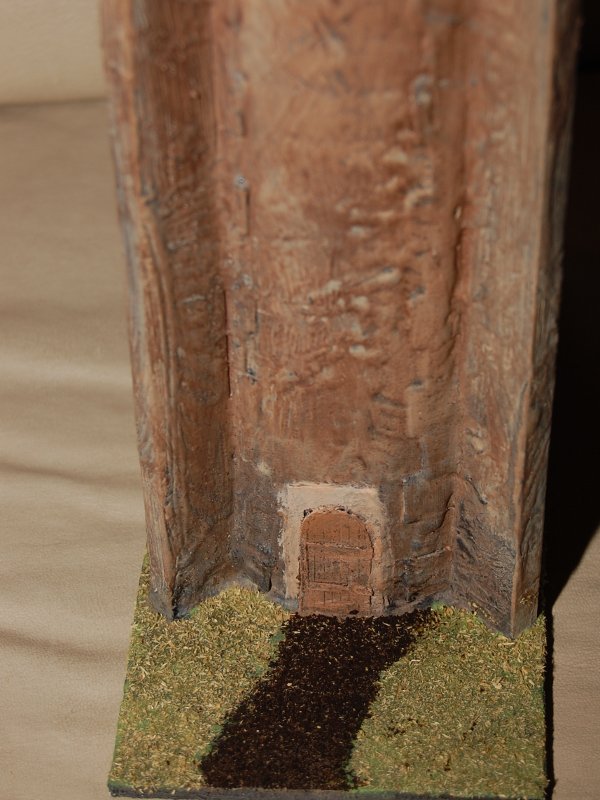
After looking at pictures on the web, especially the clock tower at the Palace of Westminster, I got started with a box for the clock itself. Then I needed a tower and grabbed a potato chip can out of the recycling bin. It didn't look right going from a round tower to a square top for the clock, but I didn't feel I had time to build a square tower. So I did what I could to make it look like it should fit. I'm still not happy with how it looks though, I wanted something that would look like it fit in western Europe, and this looked more like something for a fantasy setting.
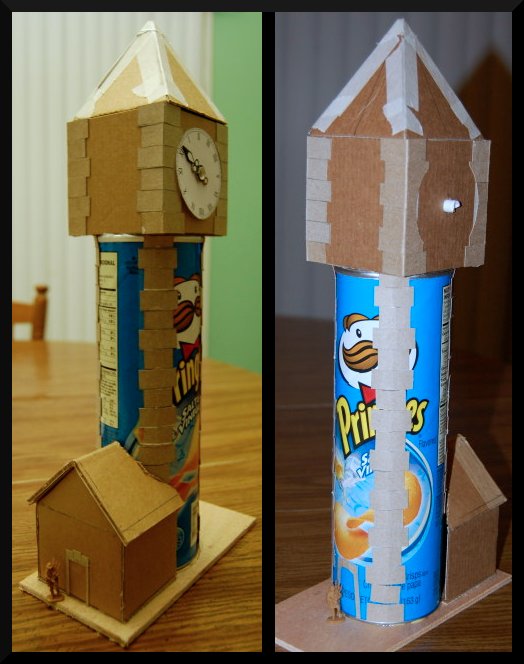
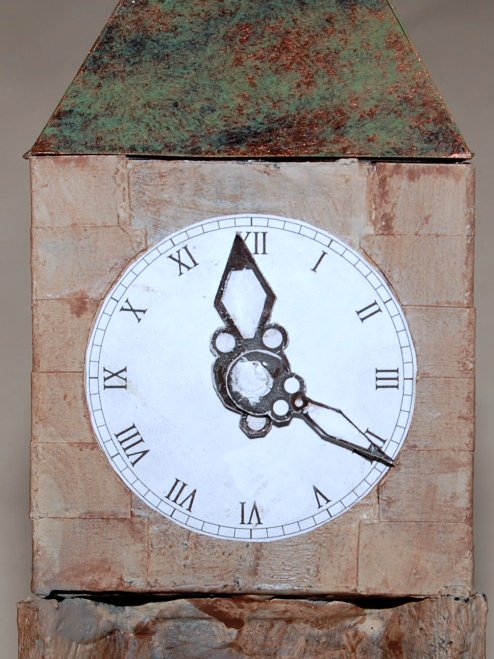
The clock face was printed from a free design I found on the web. The hands were some I designed myself, but on the first set I made the central hole too small and all but one was destroyed trying to fit them on the clock. I went back and tweaked the design to be stronger and to allow more room for the hole.
I posted the work-in-progress pictures on Terragenesis to get some feedback and they gave some good suggestions on how to improve the design, especially based on some other historical clock towers[1]. With the weekend deadline looming, I glued the wood "buttresses" right over the card "corner stones" when I probably should have removed them. But it turned out that were covered enough in the next step.
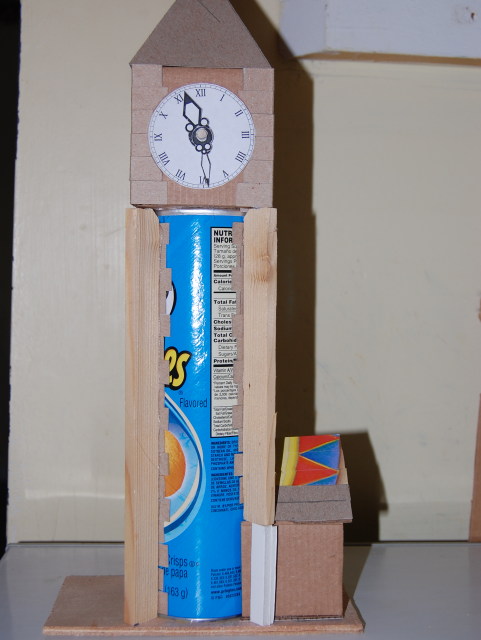
Once I had things glued on mostly how I wanted, I grabbed some plaster patch (a dry powdery cousin to Spackle) and mixed it with some gray latex house paint. Then my daughter and I liberally applied it to the structure. I tried to blob it on thick enough to cover up the card, and it mostly worked. The rest of the cardboard was just covered thinly so the texture would match.

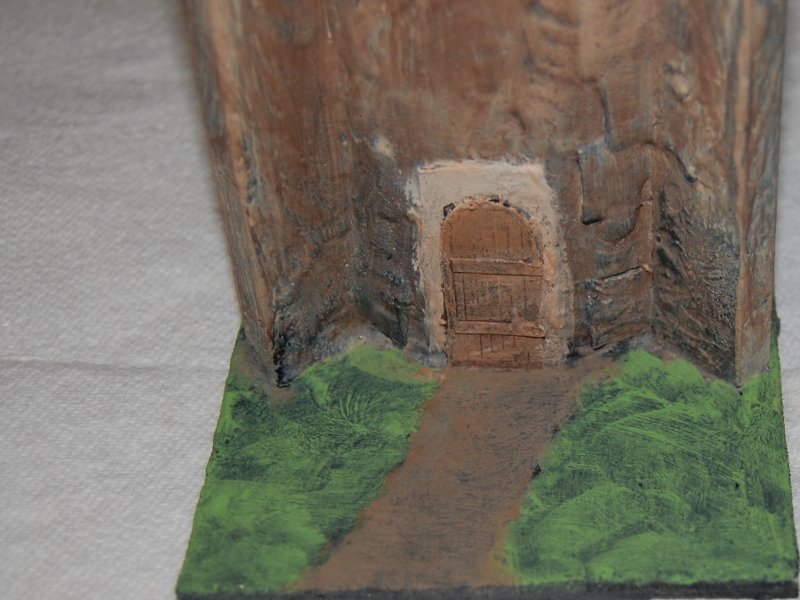
Even though the plaster had been mixed with gray paint, I decided to go over everything with black spray paint as the base coat. When that was dry I started by painting the tower with a medium tan. Everything but the ground and roofs were painted.
While that dried, I tried to get a aged bronze look for the roof parts. I started with bronze lightly painted over the black, and then a dark green stippled on top of the bronze. It looks okay so far, but needs to be lighter.
Once the tan was dry I went back over it with watered down dark brown, making sure to get in the cracks and brushing it off the raised areas to keep them lighter. The black often showed through where I got too much water, but the end effect was still something like sandstone and looks fine. I did some gray/tan highlights and mixed in some white for the door lintels and frames.
The base was also painted in preparation for flocking.
Once the clock hands had been redesigned in Inkscape, I printed them out again and glued them to 1mm cardboard. I still didn't do a good job making the holes, I tried using a power drill the paper still tore. I did manage to cut them all out without destroying any though and they fit on the rods just right. I strengthened them with super glue and glued them onto the clock.
Finally I got around to flocking the base. For the grass, I used some sawdust dyed with green food coloring, and dried, used coffee grounds for the dirt path.
References
[2] Lego Gears