Introduction
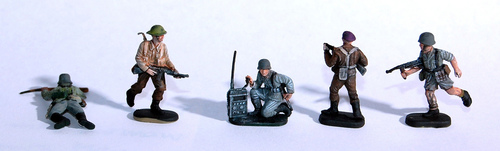
For WW2, modern and early sci-fi gaming I have preferred to use 1/72 scale plastic figures. Nominally 20m (or 22L in the Barrett Scale) they are small compared to 25mm metal miniatures, but they are cheap (usually around $0.15 each) and you can find a lot of 1/72 scale vehicles to go along with them.
Conversions
Tanker
I am just getting started (Fall 2008) on converting some figures. My first attempt is simple: making an airfield mechanic wearing a MOPP suit into a tank commander. Mainly this involves adjusting the position of one arm, trimming off some unnecessary gear, and modeling a helmet.
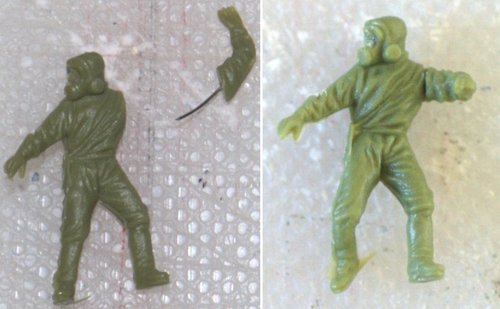
After getting the arm positioned and glued back with super glue I discovered that the legs were in a bad position and kept hitting some protrusions on the hull as I rotated the turret. So I used a metal straight pin heated in a candle flame to melt the back of the "knees" so I could bend the lower leg more. It might have been easier to remove the legs altogether, but I wasn't ready to go that far.
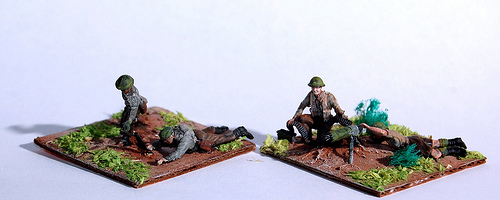
Mortar Crewman
Another conversion I've done is slightly simpler. I wanted a crouching figure that could look like he was loading a 2-inch mortar. I grabbed another Airfix figure from the NATO Ground Crew set and gave him a new head from a ESCI British 8th army figure. I also scraped off the water bottle and attached it where the belt should be. The last thing I need to do is turn his hand and give him something to hold that looks more like a mortar bomb.
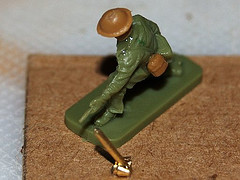
The mortar itself is a brass pin that came from an old DIY serial cable connector.
Vickers MG Crew
This project covered both the machine gun and the gunner. I had a loader from another British infantry set, but the gunner (and gun) had been lost. I really wanted to build my own gun, but struggled for parts small enough. I suppose I could have gone out and purchased some styrene, but before I got to that point I found a couple of serial connector pins. I had already used one for the 2-inch mortar, but I had the idea that if I wrapped the "barrel" with masking tape, I would have something that resembled the water-cooling sleeve. The end of the pin was square enough to resemble the breach (if you squint). I left the end of the pin exposed for the muzzle and it resembles the older ones with a booster.

The tripod is made from a bent paper clip. I used Superglue and a healthy pinch of baking soda to attach the gun to its tripod. It took a couple of tries and I ended up getting more glue and soda on the barrel than I wanted. But it's not going anywhere. I will probably add a water can and hose once the gun and figures have been glued to their base.
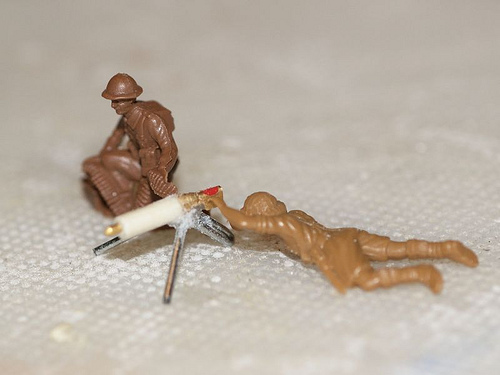
I chose a Bren gunner for the machine gunner and removed his weapon. It may not be the most appropriate pose, but he fit the height of the MG the best. The loader figure was just right and didn't need any modification
US Paratrooper Officer
One of my US companies was made from the ESCI 82nd Airborne box. Since it didn't come with any identifiable officer figures I knew I had to kit-bash one. I figured I would do a head swap on the figure without a helmet. One of the figures standing at attention had a broken gun, so he donated the head. I had been reading about officer uniforms and decided he need a bag to keep his maps and orders in. So I made that out of a bit of clear plastic.

References
Plastic figures seem to be very popular with people playing the DBx series of rules. I'm mostly interested in the modeling aspects, such as conversion and painting. The following web sites have some good information covering those topics.
- DBx Wargaming with 20mm Soft Plastic Figures
- Dan Becker's 20mm Alexandrian Army
- Tim Marshal's site has WW2 conversions
- A Painting Guide for 1:72 plastic miniatures
- Humbrol Enamel Cross Reference
- Roll Models - online store for plastic models and related items