Introduction
After building Paper Tiger Armament's Panzer 38(t) for my France 1940 campaign, I thought I would like to have a different tank for the German side. ICM has a Panzer IV Ausf D that is appropriate for a 1940 campaign. It is approximately 1/50 scale. By scaling the image down by 61.4% I could build a model that was close in size to the plastic models I already have. The only thing I wasn't sure about was if the detail for 1/50 would be to small to build in 1/72. I found out that generally this model works just fine for the smaller scale.
Building the Model
The first change I made to the model was to strengthen the road wheel assemblies with 1mm card. That way the join between the wheels and the hull would stand up to use on the wargame table.
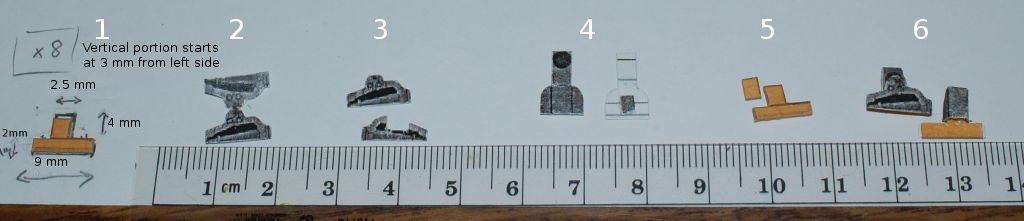
For my own benefit, I made a picture of the steps I took to build each assembly. I found it easiest to build one side at a time.
- Cut out the internal reinforcement from 1mm card (save the small rectangle from the left side)
- Cut out the spring assemblies
- Separate the assemblies and remove the middle portion of the back side
- Cut out the part that attaches to the hull, I cut off the bottom tab and tried to use it as an additional spacer, but that later proved unnecessary
- Take the extra rectangle and glue it onto the back of the t part
- Glue the thick card inside the flaps that fold up and fold down the top. The spring can then be glued on the front where it is supposed to attach (the back is not shown glued on
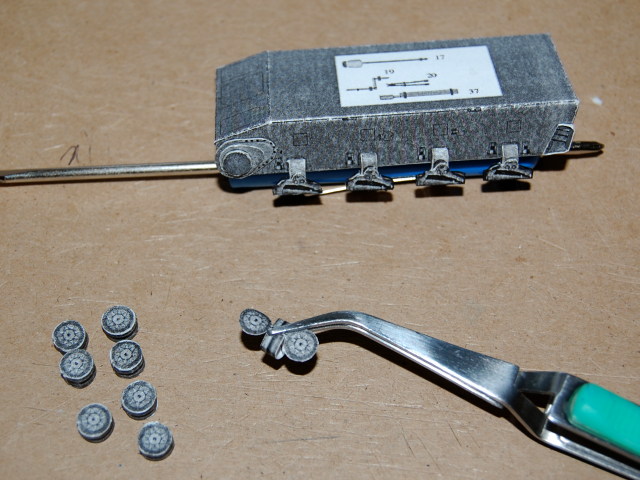
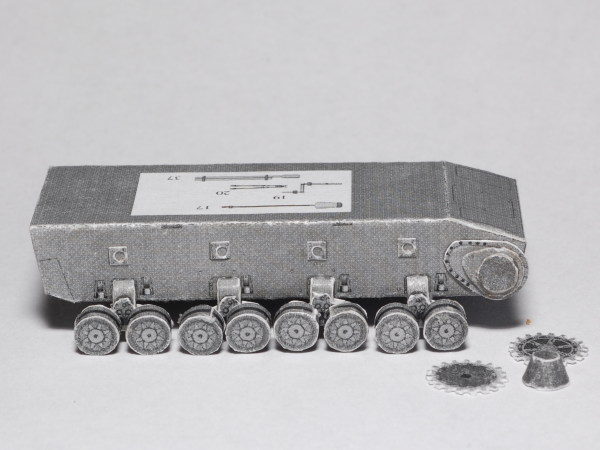
I followed the directions for the wheels. They're one piece with a black stripe intended to make them look like the double wheels on the prototype. At this scale I decided to follow the directions. I used a small tab to join the wheel strips in a circle.
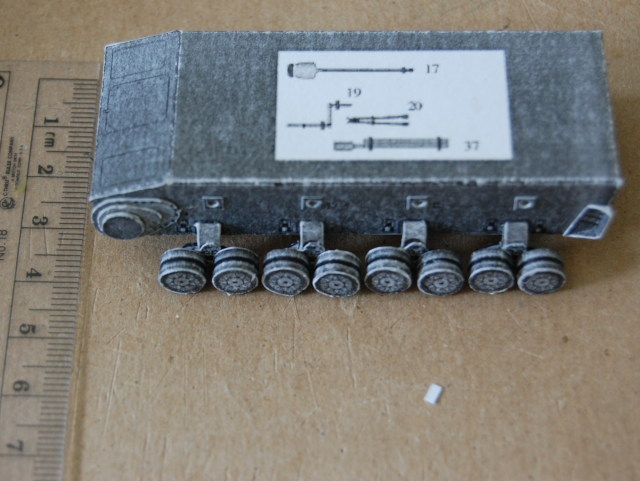
The road wheels look good glued on. I used a 1/16 inch punch to hollow out the return roller mounts before gluing them on. The first time around I used short (2.5mm I think) sections of a toothpick to attach the rollers. The second time I rolled my own from a 2mm wide strip of paper (20# bond).
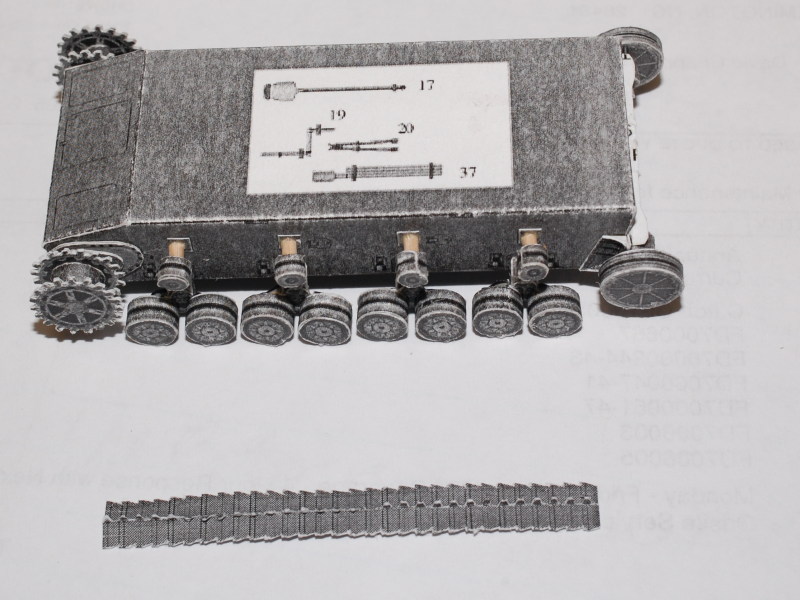
The drive sprockets and idler wheels were assembled as directed. Then it was time for the tracks. I played around with folding them as directed, but the card stock was too thick. I tried again with 20bond and it was better. Still cutting out the edges was time consuming. I figured out after my first strip that I should do it in stages. First fold the track guides and cut them out. Then glue it all together and after that cut out the sides. That way you reduce the number of cuts by half.
But then I ran into trouble. I really should have checked the scale as soon as I folded the hull, but I didn't. When I finally checked, I was very disappointed to find that it was noticeably bigger than the plastic models I was comparing against. Was all this work for nothing?!
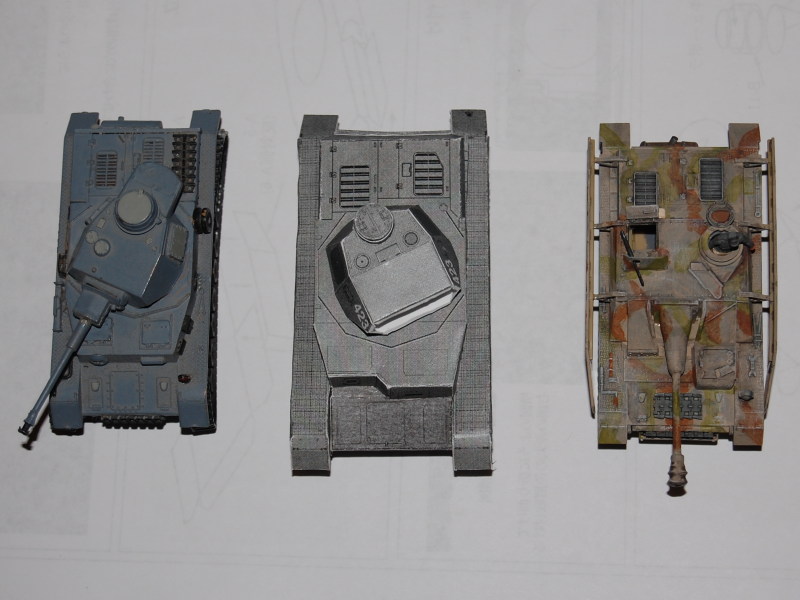
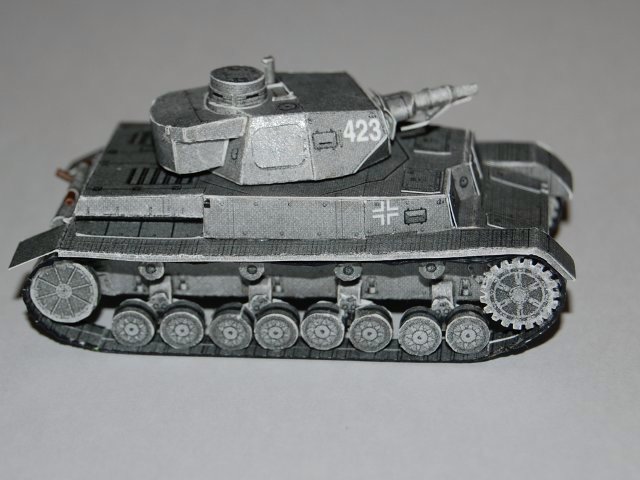
I'm pretty sure the Panzer IV F1 on the left is closer to 1/76, so I expected it to look a little small, but the StuG IV on the right is 1/72 for sure, and it still looks small beside the paper model. I was despairing about starting over, but I also didn't want to use a model on the wargame table that was noticeably bigger than it should be. So until I made a decision I continued with the turret. The gun was fun to build and went together nicely.
Starting Over
At this point, I decided I liked how the model looked enough to start over at the correct scale. I used a measurement of 70mm for the hull length and from that determined that I must rescale the ICM pages by 61.44%. Interestingly, using the formula (original scale / desired scale) * 100 comes out to 69.44%. It's amazing to me how much difference that 8% makes.
The nice thing about building a kit for the second time is that it goes a lot faster. I didn't have to spend time figuring out where parts went or how they fit. Pretty soon I had the hull together and the wheels going on again.
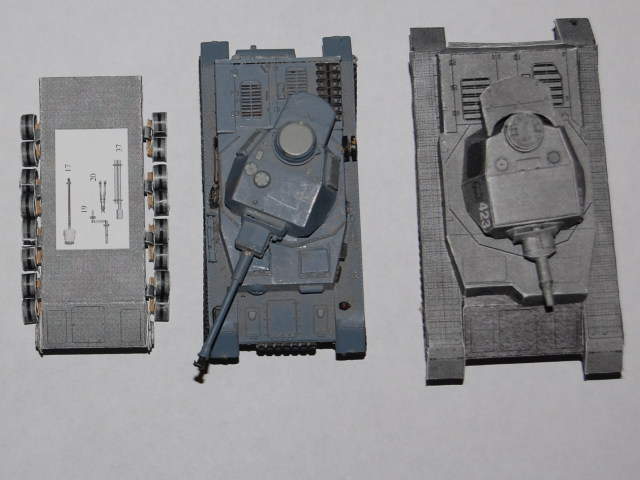
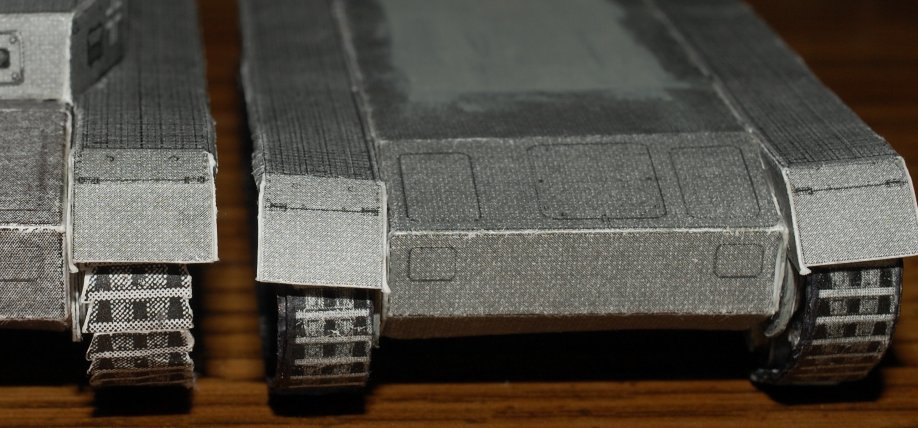
When I got to the tracks I had to make a decision. The extra effort of adding the track guides and cutting out the link edges was not adding enough to the model to make it worth doing again. I settled for a simplified track and blackened the edges to hide the white triangles. I find I'm just as happy with how it looks the new way and it took a lot less time to do. You can see the comparison below. The original Panzer with the more detailed tracks is on the left.

You can compare the the edges below. I did not finish either one completely, in that they're supposed to have extra strips of card glued on for the grouser bars that cross the track horizontally. On the first model it might have improved the 3D effect, but I felt it was unnecessary on the new model.
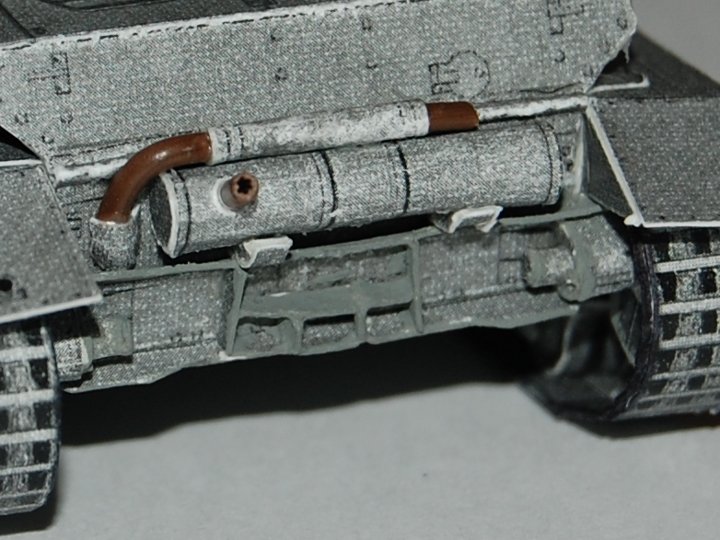
On the rear is the exhaust and I used small diameter wire for the pipes. I pulled the wire out of one section and just used the insulation for the exit pipe. In the rest, the wire helped keep the bend. You can also see where I've used gray acrylic paint to cover the paper edges. I still have to apply it to the newer exhaust parts.
So finally I have a complete tank. Then only thing left to do is build a few more little details and the stowage that attaches to the fenders. But the model is usable on the wargame table at this point. I was especially pleased with how the gun barrel came out. I managed to get it almost perfectly round — in part by cutting the edges at an angle before rolling it into a tube.
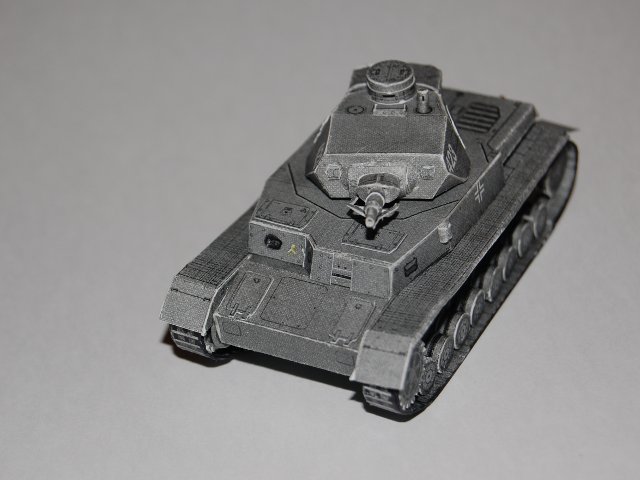
The model is quite detailed, especially at this scale, but you end up with one that looks good. Some of the parts can be difficult because they are so small, but with patience it will go together.