Introduction
I needed two German Flak guns for a Crossfire scenario and thought it would be a fun challenge to make them from scratch. Later on I found that Airfix made an old model that sells for around $6, so I would definitely think twice before trying to make it from scratch again. But it was fun once.
An important thing to note is that I did not attempt to make a realistic scale model. This was for wargaming purposes only, so as long as the players could recognize it on the table that was all that mattered. So I took great liberties in how I built the guns, especially when I opted to use what I had on hand rather than purchasing styrene, etc.
Assembling the Barrel
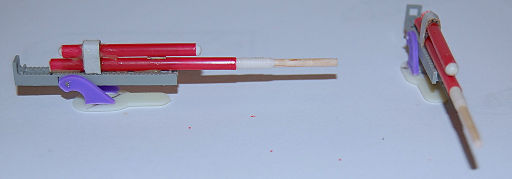
I started with the gun barrel, using a plastic coffee stir straw and a round toothpick. The toothpick was too small to fit snugly into the straw, so I wrapped it with painters tape to make it fit, and maybe to make it look like a graduated barrel. I trimmed the straw so the whole thing would fit the scale length of 16 feet.
The extra bits of straw then went to make the receiving chamber above the barrel (I'm not completely sure that's what it is called). It was attached with PVA glue and cardboard. A bit of putty went into each end to make it round. My intent was to only use parts that could be duplicated (in case I ever wanted to make more) but I had two computer bits that fit under the barrel and looked good. Unfortunately after I had glued everything, I realized that the chamber above the barrel was too long, but by then I decided it wasn't worth the risk to correct it.
The elevation brackets caused a little trouble (mainly figuring out what to make them out of). Finally I settled on carving some plastic at approximately the correct angle. They were then pinned to the gun assembly and glued to a base.
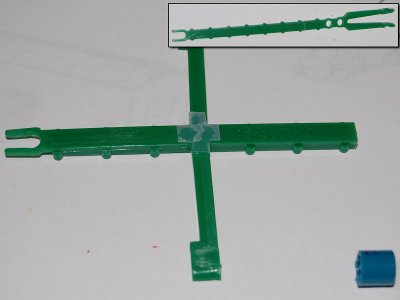
The next step was to make the base. I found some old plastic rails that came off a hard drive (or was it a CDROM) that had an interesting shape (see the inset in the picture below). The "handles" at one end, when cut off, resembled the feet when lowered so I went with it. After a little cutting and trimming the length of the main section, I used Superglue and a bit of reinforcing plastic to put it all together.
The bullet shield was easy to make. I cut some thin cardboard out, guesstimating the angle and size from pictures, and glued it together with a rectangle of balsa to reinforce the sides. A few rivets on the front and a little clean-up on the edges and it would be ready. Though I still had to figure out how to attach it to the gun assembly.
I glued two bits from a q-tip for the hydraulic pistons that stick out in the front and then attached the gun to the base. The gun was not glued, so it can rotate around on the base and elevate (though it won't stay elevated except at max).
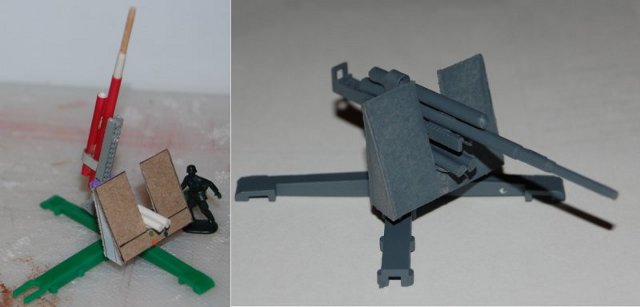
Once the models were primed I settled for a simple paint scheme of dark olive, with some of the instruments and wheels being highlighted with black. The gun shield got an additional coat of olive to set it off from the gun, and possible prepare it for a cammo scheme if I decide to go that route.
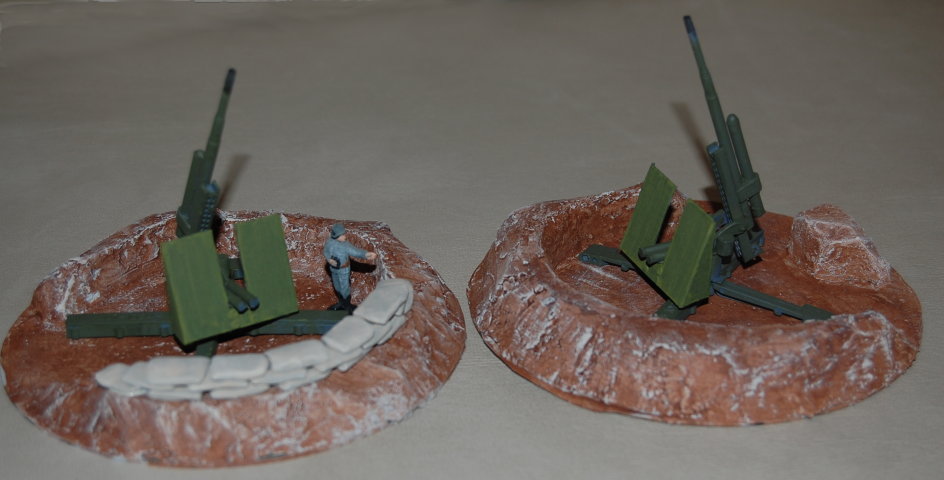
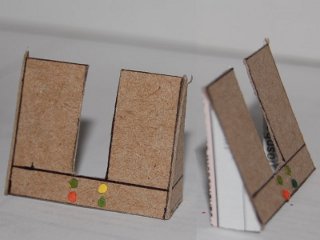
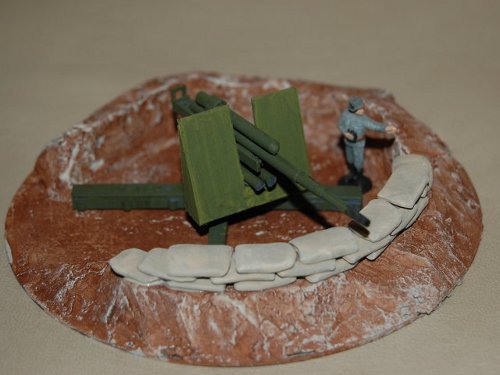
As these were made for a scenario, I also constructed two prepared emplacements for them, one with sandbags made out of sculpy.
Reference Links
8.8cm Flak 18, 88mm Flak (Flugabwehrkanone) Series, 88 mm gun, 1:72 Kit 7219 Bussing Nag 900L with 88mm Flak 18 by Mars.
German Antiaircraft Artillery, Military Intelligence Service, Special Series 10, Feb. 1943
Airfix 88mm Gun and Tractor directions.